 Export dialog will open.
Your workspace setup may consist of several projects from one or more repositories. Once you have setup your workspace, you can share it with others by exporting a Team Project Set. A project set is a text file that contains a pointer to each of the projects contained in the project set.When a project set is imported, these pointers are used to fetch the projects from the repository. Project sets can include any projects that are mapped to repository tooling that provides support for them, such as CVS. To export a project set:
Export dialog will open.Now you have created a project set file. You can now share this file with others or use it yourself to recreate your workspace. To Import a project set:
Import dialog.For CVS, you will be prompted to provide the authentication information (user name and password) for the repository as it is not included in the project set.
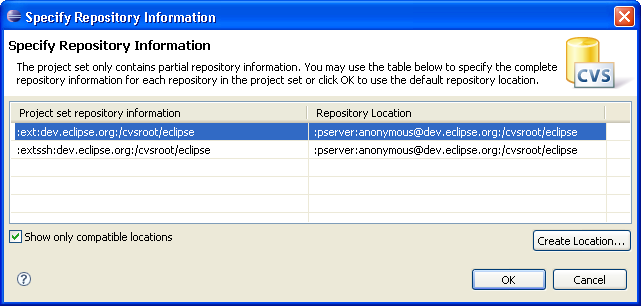
Specify Repository Information dialog
When the project set contains only partial repository information (not all locations are known) the Specify Repository Information window is displayed offering three options for Repository locations:
The user can fully configure the repository location, specify a user name, and change the connection method if required. For example, a project set file containing extssh connections can be used by a non-committer as they can reconfigure the repository location connection method on import to a pserver.

Team programming with CVS
CVS Repositories

Checking out a project from a CVS repository
Checking out a module from a CVS repository
Creating a CVS repository location
Sharing a new project using CVS
